| Ver tema anterior :: Ver tema siguiente |
| Autor |
Mensaje |
KEO 

Registrado: 27 Sep 2018
Mensajes: 813
Ubicación: USA
|
 Publicado: Dom Dic 09, 2018 12:18 am Asunto: Re-Coloring Lettering on Name Ring |
|
Publicado: Dom Dic 09, 2018 12:18 am Asunto: Re-Coloring Lettering on Name Ring |
|
|
KEO wrote:
I would appreciate any tips concerning re-coloring the letters on name rings.
I just received a CZJ Triotar, and it's a real beauty but almost all the paint has vanished from the embossed letters on the name ring. I'd like to fix that.
I'll need white and a little bit of red for the "T" coating.
My first thought was enamel like I used to use for model kits when I was a kid, but I'd like to bet some advice before I try anything. I don't want to mar this beautiful lens.
Thanks. |
|
| Volver arriba |
|
 |
SkedAddled

Registrado: 19 Oct 2008
Mensajes: 1447
Ubicación: Michigan, USA
Expire: 2021-08-12
|
Publicado: Dom Dic 09, 2018 12:40 am Asunto: |
|
Publicado: Dom Dic 09, 2018 12:40 am Asunto: |
|
|
SkedAddled wrote:
Interesting.
By "Embossed," do you mean raised lettering, or undercut(engraved or stamped)?
If below the outer surface, I'd recommend a good clean with naptha or alcohol,
then applying something like fingernail polish with maybe a toothpick or
a superfine artist's brush.
If raised lettering, I'd suggest a similar approach, but application would likely
require a different method.
_________________
Craig
Of course I'm all right! Why? What have you heard!?
Canon Digital EOS 5D Mk IV, EOS 50D, Powershot S3 iS
Vivitar 28 f/2.8 OM - Zuiko 50 f/1.8 OM - Tamron SP 28-80 f/3.5 AD2[Favorite!] - Hanimar 135 f/3.5 M42 - Soligor 135 f/2.8 T4 - Tamron SP 60-300 f/3.8 AD2 - Soligor 75-260 f/4.5 M42 - Soligor 400 f/6.3 T4 - Soligor 500 f/8 T2 Cat + Matched 2X TC - Addiction Growing!
This is us -- We drive these -- We're named these |
|
| Volver arriba |
|
|
dan_

Registrado: 05 Dic 2012
Mensajes: 1070
Ubicación: Romania
Expire: 2016-12-19
|
Publicado: Dom Dic 09, 2018 1:43 pm Asunto: |
|
Publicado: Dom Dic 09, 2018 1:43 pm Asunto: |
|
|
dan_ wrote:
The professional solution is to use fill in paints. They are fat paint sticks made specially for this purpose. I am using them constantly with very good results.

Fill the embossed letters with the paint and wipe the excess, let them dry for one day and then clean the surface with a cloth with a bit of water and soap. It works perfectly and the paint, once dried completely, is very persistent, just like the original one. |
|
| Volver arriba |
|
|
KEO
Registrado: 27 Sep 2018
Mensajes: 813
Ubicación: USA
|
Publicado: Dom Dic 09, 2018 9:13 pm Asunto: |
|
Publicado: Dom Dic 09, 2018 9:13 pm Asunto: |
|
|
KEO wrote:
| SkedAddled escribió: |
| By "Embossed," do you mean raised lettering, or undercut(engraved or stamped)? |
Indented, not raised. They're stamped, I would think. Thanks for the suggestions.
| dan_ escribió: |
| The professional solution is to use fill in paints |
That pen is exactly the sort of thing I was thinking of using. I'll look into it. Thank you.
EDIT: They're not that expensive, either!  |
|
| Volver arriba |
|
|
Gardener
Registrado: 22 Sep 2013
Mensajes: 949
Ubicación: USA
|
Publicado: Lun Dic 10, 2018 4:16 pm Asunto: |
|
Publicado: Lun Dic 10, 2018 4:16 pm Asunto: |
|
|
Gardener wrote:
You can use any waterproof paint. I used to use oil-based enamel, but now switched to acrylics . |
|
| Volver arriba |
|
|
KEO
Registrado: 27 Sep 2018
Mensajes: 813
Ubicación: USA
|
Publicado: Mar Dic 11, 2018 9:30 pm Asunto: |
|
Publicado: Mar Dic 11, 2018 9:30 pm Asunto: |
|
|
KEO wrote:
| Gardener escribió: |
| I used to use oil-based enamel, but now switched to acrylics. |
Acrylics? That's interesting. I would think acrylics would be less durable, but I suppose you can easily re-apply them. |
|
| Volver arriba |
|
|
kds315*


Registrado: 12 Mar 2008
Mensajes: 16911
Ubicación: Kehl, Germany
Expire: 2021-03-09
|
|
| Volver arriba |
|
|
DConvert

Registrado: 12 Jun 2010
Mensajes: 984
Ubicación: Essex UK
|
Publicado: Mar Dic 11, 2018 11:27 pm Asunto: |
|
Publicado: Mar Dic 11, 2018 11:27 pm Asunto: |
|
|
DConvert wrote:
| KEO escribió: |
| SkedAddled escribió: |
| By "Embossed," do you mean raised lettering, or undercut(engraved or stamped)? |
Indented, not raised. They're stamped, I would think. Thanks for the suggestions.
| dan_ escribió: |
| The professional solution is to use fill in paints |
That pen is exactly the sort of thing I was thinking of using. I'll look into it. Thank you.
EDIT: They're not that expensive, either! |
Yes very cheap in black, gold, red & yellow, but the white ones seem to be sold out from all the more local sellers.
Not a critical improvement for any of my lenses, but I'm sure there will be quite a few that will improve in looks if I do get one. Hopefully I'll remember to check again after Christmas. |
|
| Volver arriba |
|
|
Gardener
Registrado: 22 Sep 2013
Mensajes: 949
Ubicación: USA
|
Publicado: Mié Dic 12, 2018 7:27 pm Asunto: |
|
Publicado: Mié Dic 12, 2018 7:27 pm Asunto: |
|
|
Gardener wrote:
| KEO escribió: |
| Gardener escribió: |
| I used to use oil-based enamel, but now switched to acrylics. |
Acrylics? That's interesting. I would think acrylics would be less durable, but I suppose you can easily re-apply them. |
Less durable in what way? Adhesion? I have crankbaits repainted using the same set (and clearcoated) and they hold together just fine in much tougher environment. Solvent resistance? There's hardly ever a reason to bring harsh solvent near a repainted (meaning post-CLA) front ring. But, yes, may be they are less durable. Time will tell. |
|
| Volver arriba |
|
|
KEO
Registrado: 27 Sep 2018
Mensajes: 813
Ubicación: USA
|
Publicado: Mié Dic 12, 2018 9:57 pm Asunto: |
|
Publicado: Mié Dic 12, 2018 9:57 pm Asunto: |
|
|
KEO wrote:
| Gardener escribió: |
| Less durable in what way? Adhesion? I have crankbaits repainted using the same set (and clearcoated) and they hold together just fine in much tougher environment. Solvent resistance? There's hardly ever a reason to bring harsh solvent near a repainted (meaning post-CLA) front ring. But, yes, may be they are less durable. Time will tell. |
Well, the acrylics I've used solidify into a rubbery plastic. It's not really fragile, but it's not as hard as dried enamels. We may be thinking of different types of acrylics, however.
How much wear-and-tear does a name ring get, anyway? Not that much unless you're removing it over and over to get to the front element or something, and that shouldn't be happening. I would say acrylics seem like a viable alternative to consider even if they are less durable. They're certainly less toxic if that's a factor. |
|
| Volver arriba |
|
|
KEO
Registrado: 27 Sep 2018
Mensajes: 813
Ubicación: USA
|
Publicado: Jue Dic 13, 2018 9:50 pm Asunto: |
|
Publicado: Jue Dic 13, 2018 9:50 pm Asunto: |
|
|
KEO wrote:
| dan_ escribió: |
| The professional solution is to use fill in paints. They are fat paint sticks made specially for this purpose. I am using them constantly with very good results. |
Thanks again for this suggestion, dan_. These things work great. Very fast and easy, apart from the drying time.
They're like a big crayon. They have a hard crust on the outside (at least mine did) and you have to break through that to the softer paint inside. It's similar in consistency to thick cream cheese. 
You smear it over the lettering, being sure to fill in all the cracks.
The trick seems to be wiping off the excess. Use a fine cloth or tissue, not something rough like a bath towel, and wipe gently. The paint comes off easy, and you don't want to scrub it out of the lettering.
I think I did a fairly poor job since it was my first time trying it, and the ring already looks quite good. |
|
| Volver arriba |
|
|
dan_
Registrado: 05 Dic 2012
Mensajes: 1070
Ubicación: Romania
Expire: 2016-12-19
|
Publicado: Vie Dic 14, 2018 4:57 pm Asunto: |
|
Publicado: Vie Dic 14, 2018 4:57 pm Asunto: |
|
|
dan_ wrote:
You are welcome.
Yes, that's the tricky part.
I use wooden toothpicks to fill the letters and wipe the excess. Then an ear stick with wadding a bit wet and with a bit of soap to wipe around the letters (without touching them). I let the paint to dry (semi-dry, in fact) for one day and then it's easier to wipe the excess with a fine cloth or, even better, with some paper a bit wet and with a bit of soap (not to smear the paint inside the letters). |
|
| Volver arriba |
|
|
Gerald

Registrado: 25 Mar 2014
Mensajes: 1292
Ubicación: Brazil
|
Publicado: Vie Dic 14, 2018 9:56 pm Asunto: |
|
Publicado: Vie Dic 14, 2018 9:56 pm Asunto: |
|
|
Gerald wrote:
I suppose the lettering is engraved, not simply silk-screen printed. You can use nail polish or wood paint, which exist in all colors, to restore the worn paint in the grooves. Apply nail polish or paint with a small brush without worrying too much if you get some paint out of the groove. Wait until it almost completely dry and remove the excess with a cloth folded multiple times and slightly soaked with solvent/remover. The result is suprisingly good.
_________________
If raindrops were perfect lenses, the rainbow did not exist. |
|
| Volver arriba |
|
|
KEO
Registrado: 27 Sep 2018
Mensajes: 813
Ubicación: USA
|
Publicado: Mié Ene 16, 2019 9:07 pm Asunto: |
|
Publicado: Mié Ene 16, 2019 9:07 pm Asunto: |
|
|
KEO wrote:
| dan_ escribió: |
| I use wooden toothpicks to fill the letters and wipe the excess. Then an ear stick with wadding a bit wet and with a bit of soap to wipe around the letters (without touching them). I let the paint to dry (semi-dry, in fact) for one day and then it's easier to wipe the excess with a fine cloth or, even better, with some paper a bit wet and with a bit of soap (not to smear the paint inside the letters). |
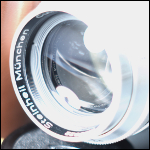
There was a big particle of something inside the front element so I removed the ring again in order to blow it away. While I had it off the lens, I thought I'd snap a shot to post.
Like I said, I think I did a poor job just because it was my first time using this technique suggested by dan. I'm leaving it the way it is though, because I actually think it looks appropriate for a 70-year-old lens. When I started the ring was almost completely black with virtually none of the original lettering remaining.
This was really fast and really easy, and when I do it again I should be able to get a near perfect result since I know what I'm doing now. 
 |
|
| Volver arriba |
|
|
|
|
|
No puedes publicar temas nuevos en este foro
No puedes responder a temas en este foro
No puedes editar tus mensajes en este foro
No puedes borrar tus mensajes en este foro
No puedes votar en las encuestas de este foro
|
 Español
 中文
 Magyar
 Русский
 Deutsch
 日本語
 Français


